
 |
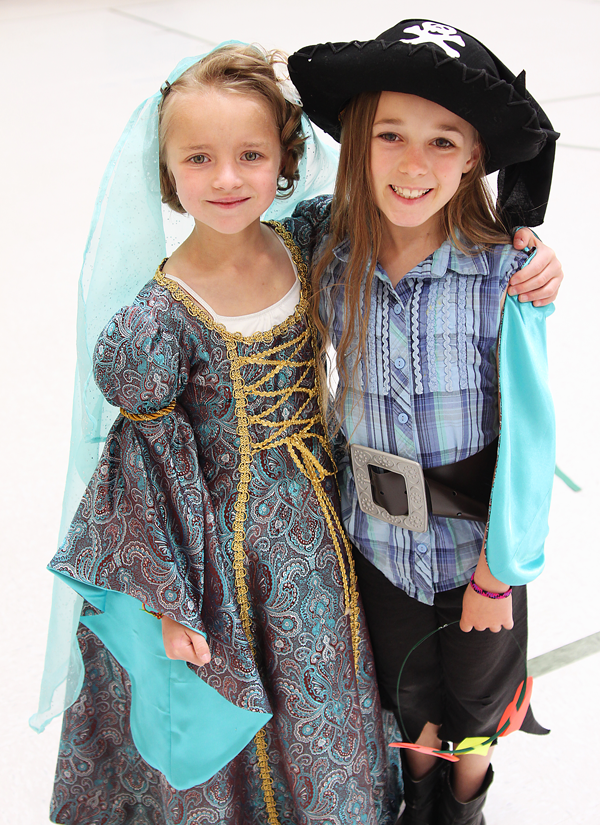
| Thought this could have been a cute picture by the playset. I was wrong. Still, it is a nice full view of the dress, especially the sleeves, don't you think. [Click to see a larger version for the full effect of the face] |
 |
| This is the part, where she tries to melt the dress off without touching it because her arms can't take the torture of the soft, light, warmth of poly-fil. I'm the meanest mom. |
I decided to make a princess costume for my 2nd grader the night before the school's Renaissance Fair. Yes. It makes sense to do this, you see, because had I planned to do it a week before, it would not have been realistic. After all, where would I find the time to delve into such a preposterous project. I would have to look for patterns for hours, pick the best one, then search for fabrics for hours, this would take several trips to the fabric store to find just the right fabrics, not to mention timing my purchase just right to take advantage of sales. And then, actually making time to sew each day. No, I didn't even give it another thought. Not until the day before, of course. Somehow, I sucked myself into watching "My Big Gypsy Wedding" and was infected by the lure of large gaudy dresses, I guess. So, I dropped her off at school at noon, drove to the fabric store, picked out a pattern, got the fabric and then at six o'clock at night or so, started tracing the pattern. I started sewing at nine and was done by one. Yup, this is how I can get things done these days.
The sewing went quite flawlessly. I'm impressed with myself for not having to use the seam ripper once. However, myself made up for it by shorting me on the fabric by one sleeve, including lining, and buying the wrong kind of trim -rope instead of flat. Luckily, I was able to send my husband with explicit instructions and fabric samples to get more. He loves to do that. The fabric store employees also love to see him shopping for fabric there. Then, they're disappointed when they learn he's not the one sewing.
 |
| Wasn't sure what to do with the veil, but a couple of bobby pins seem to work. |
***
I didn't get a chance to take any fabulous pictures of the costume or to check for fit since Monkey Pants was sleeping while I was sewing it. I made an attempt to take some quick shots in the back yard after breakfast, before driving her to school, but then there was the arms incident. You see, Monkey Pants has issues. One, she wanted to be a pirate. I convinced her to go for princess for once in her life. She felt she could only succumb to my request by demanding that there be no pink, only blue, and also puffy arms because princes have puffy arms, according to her. Second, to make the top of the arms puffy, I had the brilliant idea of shoving poly-fil up there before rolling up the golden ropes that cinch up the upper sleeve.
Issues.
Monkey Pants has SPD (Sensory Processing Disorder) which makes her feel that clothing, socks, and shoes are out to get her. Sometimes, things must be very tight, sometimes tightness is bad. There was also the skirt phase, then the leggings only phase, and now the really tight shoes phase. Anything else, is torturous and may in fact cause the earth to stop moving. So, I knew. Yes, I knew that there would be something on this dress that was going to bother her and I was bracing myself for what it was going to be, like a bad, but sure surprise. I only hoped, it wasn't going to be earth stopping this time, because then she would probably end up missing the fair while we dealt with the issues and re-started the earth's rotation. I thought for sure, it would be the unfinished arm seams, or a bit of the metallic gold trim touching her skin. No. I wasn't even close. It was the evil, evil poly-fil. She started eyeing it wearily as I brought it up. Immediately, she declared it made her COLD. Yes, that's how SPD works. No sense what so ever. And apparently, it started making her shoulders melt? She was trying to writhe her way out of it. So much for the five minute photo shoot.
I was only able to convince her to keep the dress on by telling her that gum would distract her from the bothersome poly-fil. And it worked. By the time she got to school, and some compliments started trickling in, she was feeling much better in it. Hooray!

 |
| Walking past the dance floor mirrors at school, she sees herself in all her glory for the first time and silently hugs me while smiling with her whole being. Had to stop to take a snapshot together, even if it was with the camera in front of my face. I do wish I had stepped out of the seam of the mirrors, but I was afraid the moment, that thirty second moment of happyness, pride, and gratitude, would be lost and I was not about to let it get away from me. |
***
 I picked this pattern, Simplicity 5520, because I was paying full chain-fabric-store-price, I could comfort myself with the fact that it has two other boy costume patterns in it. Also, it requires no gathering of the skirt. The pieces are one piece from shoulder to hem. So it's just a lot of straight vertical seams. The most time consuming part, would be the sleeves and even they aren't difficult at all. I do wish that it had yardage for an optional contrasting fabric through the middle. One could easily do this, but I was focused on my one day project goal, and I didn't want to stray from the pattern or take any chances.
 The only thing I did different was use rope trim instead of a fabric band on the arms. The fabric band is attached with velcro at the ends. I sewed the ends of the rope to a small piece of 1/4" elastic instead, and slid them up the arms. I made the size 5 with the size 6 length for a skinny, small 7 year old. I had her wear a white camisole underneath for comfort which ended up showing on top. I don't know why the chest is so low cut, or she just has a a very small bodice. I didn't mind it, I actually thought it looked like part of the costume. I also had her wear a tutu underneath to puff up the dress a bit, mostly because she's so thin, to give the dress a bit of form, and also to help her not step on the front of it while walking. The final cost was about $65 including the pattern. Plus $12 for glittery gold shoes from Payless Shoe Source. I guess I'm set for Halloween this year.
Oh dear, I am quite certain my 2nd grader has SPD....i found immense comfort reading this post! Beautiful renaissance princess costume!!
ReplyDeleteBeautiful!!!
ReplyDeleteSo glad my children don't/didn't have SPD!! 'cause I can totally see ME in this scenario!! Except I probably wouldn't have finished it in the one night and disappointed me, my child, etc.
You did an exceptional job.